til lidt læsning har jeg sakset denne engelske artikke om bånd
Analog Tape Recorders
Basics of Analog Recording
The tape recorder is the principal instrument of the classic
electronic music studio. The technical quality of the composition
is limited by the decks used, and may be further compromised by
how the decks are used.
The factors that determine the possible quality of a recording
made on any analog deck are tape speed and track width. (Surprisingly,
the electronic design of the deck has a relatively small effect
on quality as long as drastic flaws are avoided. The difference
in price among various decks of the same format primarily reflects
durability of the machine.) Speeds and widths in common use today
are:
speeds		widths	tracks
30 ips		2"	16-24
15 ips		1"	4-16
7 1/2 ips	1/2"	2-16
3 3/4 ips	1/4"	1-8
1 7/8 ips	1/8"	2-8
You can probably find decks that run at all combinations of
these, but as a general rule, the wide tapes are run at the faster
speeds. The ubiquitous cassette finishes last at 1 7/8ips on 1/8"
tape. The track width depends not only on the width of tape but
on the number of tracks stuffed on the tape.
The format most commonly used is 1/4" tape: 2 tracks at
71/2 or 15 ips. This meets minimum standards for broadcast audio
quality while remaining reasonably economical. Cassettes and 1/2"
8-track are also widely used.
The track numbering of 1/4" four track format tape is
a little confusing. The tracks are actually numbered from top
to bottom 1,2,3,4; but since the quarter track stereo consumer
format recorded left channel on track 1 and right channel on track
3, you occasionally see controls grouped 1,3,2,4. If you are constructing
tape for four track playback, use 1=left front, 2= left[1]
rear, 3=right front, 4=right rear
The Generic Tape Deck
All tape decks have two main systems: some mechanical apparatus
for moving the tape past the heads, and electronics for recording
on and playing back from the tape. Sometimes these parts are physically
as well as conceptually separate, but most often they are in the
same box.
The Mechanical System

Tape Path
Tape is threaded from left to right on most modern tape decks.
Tape starts from the SUPPLY REEL, runs past one or two TAPE GUIDES
or TENSION ARMS, past the ERASE, RECORD, and PLAY HEADS (remember
the order), between a CAPSTAN and PINCH ROLLER, past more guides
and arms, and finally onto the TAKEUP REEL.
Motion of the tape is controlled by the capstan. This is a
steel shaft which is always turning at a constant speed. When
the PLAY button is pushed, the rubber pinch roller squeezes the
tape against the capstan and the tape is pulled past the heads.
The TAKEUP MOTOR winds the tape onto the takeup reel as this goes
on. Some back tension is necessary to keep the tape tight against
the heads. This is generally applied by providing a little power
to the SUPPLY MOTOR (Which always runs backwards; it may also
be called the rewind motor.), although there are other methods.
When the tape is to be rewound, the pinch roller stays away
from the tape and full power is applied to the supply motor making
the tape zip backwards. (A low power is applied to the take up
motor to keep the tape tight.) To save wear and tear on the heads
and to suppress some loud annoying sounds, one or two TAPE LIFTERS
pop up to pull the tape away from the heads during this operation.
When the machine is in the FAST FORWARD mode, the same sort of
things go on, but this time the takeup motor gets full power.
There are brakes on both reel motors to stop the tape quickly
and gently. Because the tape and reels can build up a fair amount
of momentum, care must be taken in going from one of the fast
modes to the play mode to avoid damaging the tape. Machines vary
in their approach to this problem:
- Some make you push STOP before PLAY.
- Some have a time delay if PLAY is pushed in a fast mode.
(They stop first, then play.)
- Some electronically keep track of the tape motion.
- Some have to be carefully operated.
In any case, you have to spend time getting to know your machine.
Edit Mode
I mentioned earlier that the tape lifters pop out during the
fast modes to keep the tape off the heads. Some decks do this
in STOP mode too. (This is cheaper, since the lifters can be attached
to the pinch roller mechanism.) In either case, we often want
to hear the tape in fast or stop modes, so the better machines
have a way to defeat the tape lifters. There are different names
and different versions of this process; here are the most common:
- STOP EDIT
- allows you to hear the tape as you move it by hand so you
can find specific sounds.
- DUMP EDIT
- is a play mode in which the takeup reel doesn't turn. This
allows large sections of tape to be run off into a wastebasket
or other appropriate receptacle.
- CUE
- allows you to hear the tape in the fast modes. (Some decks
only cue while the buttons are held down.)
The most advanced decks have a SHUTTLE lever that enables you
to do all of these without actually touching the tape.
Somewhere along the tape path is a gimmick that prevents the
transport from working unless the tape is threaded tightly. This
may involve a tension arm, a small wire switch, or even a light
and sensing device.
Basic Controls
These controls are the ones you will be using the most:
Transport Motion
These get the tape going. They are PLAY, REWIND, FAST FORWARD,
STOP, and sometimes PAUSE.
Record Safety
Prevents accidental recording (and erasure). This is most useful
when there is a separate switch for each channel.
Record Button
Most often used in conjunction with PLAY, this starts the recording
process. Many decks do away with the SAFETY feature by making
you push both PLAY and RECORD to start recording.
Monitor Select
Allows the choice of listening to the input signal or the signal
on the tape. If this is set to "tape" and the tape is
not moving, you hear nothing. A third choice on some decks allows
you to listen to the tape as it goes by the record head. (see
SYNC, section 2.8)
Other Features
The basic electronic requirements for a tape deck are an amplifier
and bias oscillator for recording and a preamplifier for playback.
With the most expensive decks that is all you get. Less expensive
machines are usually bristling with extra features to attract
the consumer. Here are a few of the extras you will find.
Microphone Preamps
These used to be very common because the presence of a microphone
input defined the class of machine (consumer or professional)
for determining import duty. They would be useful if they were
ever very good.
Mic-Line Mixing
This allows you to do "voice-overs" as you are recording
music. I guess somebody does this. (An interesting variation on
this is found on many Revoxes. If only one channel is recording,
both inputs mix to that channel.)
EQ and Bias Switches
Allows you to easily change styles of tape. Vital on cassette
decks, some of which now do this automatically.
Noise Reduction
Vital on cassete decks and multitrack reel to reel machines.
Output Volume Controls
Surprisingly, this is rather rare.
Headphone Outputs
These are almost universal. Some decks have an independent
level control for headphones.
Variable Speed
This is exquistely useful for electronic music purposes. Most
decks seem to have it these days, but the range of the built in
kinds is usually not very wide. The best are those available as
accessories to a few decks.
Level Meters
These are not really an option, but decks vary widely as to
style and quality of these.
Traditional VU Meters

These developed in the old days of radio, when they indicated
the percentage of legal modulation a station was generating. They
also had a dB scale, with 0dB at the 100% modulation point, which
is the only scale we pay attention to any more. On most tape decks,
the 0dB point is some standard recording level. (The standard
used most studios for reel to reel machines is 250 nanoWebers
per Meter.)
There are two vital factors to keep in mind when you are using
VU meters:
1. They measure the average signal, and move rather slowly.
This means brief peaks will not be properly indicated and may
distort. As a hedge against this problem, many meters now have
a red light that lights when the signal hits +6dB. The actual
recording level you use will depend heavily on the material. As
a general rule, keep the meter just below 0dB, with short excursions
into the red zone allowed.
2. They do not have a flat frequency response. Most meters
exaggerate the low frequency readings and do not respond to signals
above 8 khz very well. A good rule is to keep bright signals down
an extra 6 dB. (An especially good idea, since high frequency
signals are the most likely to be distorted in the recording process.)
Peak Meters
These are seen mostly in European and Japanese gear. They look
much like VU meters, but they do not average the signal. Instead
they jump to the highest level and fall back rather slowly. If
a signal were measured on both a VU and a peak meter, the peak
reading would appear higher-- tape deck manufacturers compensate
for this by moving the numbers. The result is that you record
the same way on either, keeping the music just above 0 on the
loudest parts.
Zero on a peak reading meter corresponds to +4 on a VU meter.
LED Meters
These are very much in style on Japanese cassette decks. They
actually perform better than VU meters as far as frequency response
is concerned, but do not average in quite the same way. The main
disadvantage is that cheap ones do not have enough segments to
properly show what is going on. The best ones combine the peak
and VU functions, with the highest led staying on longer than
the others, which means you can always see the higest level reached
in the last two or three seconds.
Tape Counters
Most tape decks have numerical readouts that keep track of
your location on the tape. These may be electronic or mechanical
in design, but that really makes no difference. What really matters
is what the counters count. The inexpensive kind (found on most
cassettes) count turns of the takeup reel. (Actually about four
numbers go by for each turn.) Since the amount of tape wound varies
according to direction of operation as well as location on the
tape, these meters are only useful for coarse operation. Counters
on more expensive decks actually measure the tape with a special
wheel and are quite accurate. Tape decks occasionally have auto
stop or locate features which react to the tape counters.
Calibrated Level Controls
Professional quality decks usually do not have output level
controls, because level is best controlled at the mixer. (The
fewer controls there are, the less the chance of a mistake.) When
such a control is provided, there is usually a switch (or sometimes
a "click" on the knob) to set the output at calibrated
level. All of the studio machines are calibrated to provide -10 dbv
at the patch bay when the VU meter reads 0. The new four track
decks have calibration clicks on the inputs also.
Tape Bias calibrations
For quality operation, any tape deck must be carefully adjusted
for the tape in use. This complex procedure will be described
in the technical manual that comes with the better decks.
Cleaning Heads
In order to get a good recording, the tape must be in very
intimate contact with the heads. The wavelength of a 15khz tone
recorded at 15 ips is one thousandth of an inch, so a separation
of half that amount can be expected to cause some loss of signal.
This is not much thicker than a fingerprint. You can not expect
good results unless the heads are clean.
Heads can be cleaned with denatured or 91% isopropyl alchohol
on a cotton swawb. Procedure is simple, just dip the swab in the
alcohol and scrub each head. If there is anything on the head
that will not come off with this method, find a technician. Cleaning
at the beginning of your session should be adequate, unless you
get carried away with the grease pencil.
If you notice a build-up of tape oxide on the capstan or tape
guides, you may clean these also. Do not clean anything else.
Recording Tips
The best decks will only give results comparable to their use.
In addition to the detailed instructions in the rest of this article,
the following tips are offered in the interests of quality recording.
Label your tapes carefully and thoroughly. Proper labeling
reduces the number of times a tape must be played. Include:
- your name
- name of tape
- date recorded
- speed and format
- noise reduction (essential on cassettes)
- heads or tails
- details of calibration tones
You may put this information on the box or on the tape reel.
(The name of the tape and your name must be on the tape reel of
course.) I like to number my reels and put most of the information
on the box.
Keep tapes tail out. (That means in the just played
rather than the just rewound state.) This will reduce print-through
and deformation of the tape.
Put leader at the beginning and end of important tapes.
This greatly reduces fumbling around in front of the class.
Place calibration tones at the beginning of finished
tapes. This simplifies the process of making copies. The easiest
way to do this is to record an entire reel at your favorite calibration
level (such as 0vu) and frequency (say 700 hz) and cut off sections
as they are needed. Separate the tone from the piece with a long
leader so there is no print through.
Use noise reduction where appropriate, but do not use
noise reduction where it is not needed. Synthesizer licks, with
their restricted dynamic range and pure, easily distorted tones,
are usually better off without noise reduction. So are sounds
at extremely high or low frequency, and sounds that are pretty
much continuous.
Keep the number of generations to a minimum. For example,
if you have pitch shifted a sound, and later decide you like the
result better if it is also flanged, you will be one generation
ahead if you back up a step and pitch shift and flange the original
source on one pass.
Keep your levels high. You can always turn sounds down
in the final mix, but if you try to raise the volume of weakly
recorded material, you will get a lot of noise.
Spot distortion early and redo the process if necessary.
Distortion grows as tapes are copied, and it cannot be removed
once it occurs.
Note On Mastering
Mastering is the creation of a final version of your project,
ready to duplicate. This is done by the duplication house, to
match the equipment they will use to make your cassettes or CDs.
Premastering is making the tape you will send to the dupe house.
Usually a premaster is a first generation mixdown, but if your
project has several cuts, the premaster will be assembled from
the best mix of each.
Here are the rules.
- Use DAT or 1/4" reel to reel.
- Record DAT at 44.1 khz.
- Record reels at 15 ips (or 30 if you've got it.)
- Start with a 1khz tone at -12 on a DAT or 0 on a reel. Label
these.
- On a reel follow with a 10khz tone at 0. Label these.
Have 5 to 10 seconds leader on analog or recorded silence on
DAT between cuts. DATs must have no unrecorded spots. If you want
index numbers during songs (or transitions with no silence) indicate
the absolute time these are to occur.
Be sure that all songs are the same level. If you are having
cassettes made, compress about 2:1. Adjust the threshold for the
sound you want.(If you don't the dup house will do more!)
Send the Master, but keep two copies.
This is taken from literature put out by one popular dup house.
They all differ slightly in their requirements.
Recording on a Revox With a Microphone
[Note: The UCSC Electronic Music studios feature Revox PR-99
tape recorders as the workhorse analog machine. These or similar
models are so common I have included operating instructions for
them. Adapting thse instructions to other brands of deck is only
a matter of detail.--pqe]
One of your first assignments will be to make a recording of
a sound with the microphone.
1. Disconnect the deck you are using from the monitor to avoid
feedback.
2. Thread your tape. [Notice the flapper that sometimes covers
the play head. If the tape winds up on the wrong side of this
thing, it will not play back.]
3. There is an adapter in the studio that allows the microphone
to be plugged directly into the front of the Revox tape recorders.
Make that connection, checking that you are using the proper channel.
(Instructions assume left channel.)
4. Set switches:
- POWER ON
- MONITOR INPUT
- REC-L ON
- INPUT SELECT MIC-LO
- REC-R OFF
- SYNC OFF
5. Turn INPUT LEVEL RIGHT off. Position the microphone and
make a few trial sounds, adjusting INPUT LEVEL LEFT so that the
meter just reaches into the red zone. (Both meters will respond
actually. Pay attention to the left one.)
If you must turn the INPUT LEVEL control above 7 to get a strong
reading on the VU meter, move the microphone closer to the source.
If the LEVEL setting winds up at 2 or lower, move the mic away.
6. Zero the tape counter.
7. Push the REC and PLAY buttons together. When the tape has
started, make your sound, then STOP the tape.
8. When you listen to the tape, take care to avoid feedback
through the studio monitors. Prevent this by switching the MONITOR
switch to TAPE, and by turning the INPUT LEVEL down.
9. Select the tape deck on the studio monitor switch, REWIND
to the zero point on the counter, and PLAY what you have just
recorded. Under these conditions the tape should sound identical
to the actual sound. Listen for these problems:
- WEAK SIGNAL
- The INPUT LEVEL control was set too low, or the switch was
on MIC HI.
- NOISE WITH WEAK SIGNAL
- The microphone is too far from the source.
- NOISE WITH STRONG SIGNAL
- The sound you are attempting to record is too faint for these
surroundings.
- DISTORTED STRONG SIGNAL
- The INPUT LEVEL control was set too high. (Watch for the
flashing red light.)
- DISTORTED WEAK OR MODERATE SIGNAL
- The microphone was too close to the source.
- TOO MUCH BASS
- The microphone was too close to the source.
- WEAK HIGH FREQUENCY
- The microphone was not pointed directly at the source.
If at first you don't succeed, try take two. Remember to disconnect
the tape deck from the studio monitor before you turn up the microphone.
Some Common Mistakes in Using the Revoxes
Switches
To record a signal from the patch bay, the INPUT SELECTOR switch
must be set to AUX. The OUTPUT SELECTOR switch should be set on
STEREO. If it is set on LEFT or RIGHT, you will only hear one
channel.
The tape dump switch on the PR-99 will prevent rewind or fast
forward, and of course, dump tape during play.
The older Revoxes have an input sync feature. If a track is
in sync mode, it won't go into record.
Threading
There is a hinged shield that flips up over the playback head
when the play button is pushed. If the tape is in front of that
shield, there will be no sound.
The head cover plate can be removed. There is no reason to
do this, but students often do, hoping it will make the tape easier
to mark for splicing. If the machine is threaded with the plate
off, it is very easy to get the tape behind the tape lifters,
and the tape will not move when the play button is pushed.
VU Meters
The VU meters will respond fine to very low frequency sounds,
but tape won't. The VU meters will also respond if you patch your
signal to the output instead of the input, but nothing will record.
Overheating
If a Revox is run for 24 hours in a row, it will begin to behave
strangely (wouldn't you?).
Varispeed
Check it.
Editing On the Revox
Finding the Spot
The slide switch just below the head assembly puts the deck
into edit mode. When this switch is to the left, the tape is against
the head so that the sound on the tape may be heard when the reels
are moved by hand. You get out of edit mode either by pushing
PLAY or by pushing the pinch roller toward the capstan. NEVER
ATTEMPT TO PUSH THE SLIDE SWITCH TO THE RIGHT. (When you are in
edit mode the fast modes will operate only while you press the
buttons.)
To find the splice point, enter edit mode, put a hand on each
reel, and move the tape back and forth. You are looking for the
very beginning or end of the sound. The faster you turn the reels,
the more natural the tape sounds, so the best way to move the
tape is in quick, short jerks. You will soon find that it is easier
to find the beginnings of sounds than the ends, and that it is
quite hard to find one sound in a complex texture. You can zero
in on sounds by rocking the tape back and forth in shorter and
shorter chunks. Wind up with a movement to the left if you are
finding the start of a sound.
Once you have found the sound, mark the tape with a dot over
the play head using a grease pencil (never use ink or chalk).
Splicing the Tape
Make sure your hands are clean and free of oil.
Before you splice, cut a three or four inch strip of splicing
tape and stick it to the Formica block (These are 2X5" bits
of formica glued to the top of the table near the splicing block.).
Use a razor blade to cut the strip into "tabs" 3/4 in.
long.
Place the tape in the splicing block back side up (that's the
black side of the tape with Ampex 406) with your mark over the
diagonal notch. The tape will stay put because of the way the
block is grooved. Using the notch as a guide, cut the tape with
a quick motion of the razor blade towards yourself. Pull the separate
pieces of tape out the ends of the block and repeat the process
at the other splice point.
Place the two pieces of tape you wish to splice in the block
so the ends butt together but do not overlap. Use the point of
the razor blade to pick up one of the precut tabs of splicing
tape and set it in the block across the splice. Rub the back of
the splicing tape until it sticks. Remove the spliced tape from
the block by pulling up smartly at both ends, the tape should
snap out without wrinkling. Set the splice on the raised portion
of the block and rub on the back of the splicing tape until all
of the bubbles are gone. You may wish to use a hard object for
this if your thumbnail is not up to the job.

Examine your splice. Any of the following mistakes will make
trouble eventually.

GAP BETWEEN THE TAPE ENDS. Any exposed sticky stuff is bad,
as it will make the tape hang up on the reel. This is often caused
by a difference in the way the two pieces of tape are cut. The
Revox will stop when it encounters such splices.

TAPE OVERLAPPED. This will thump as the tape is played.

SPLICING TAPE HANGING OVER THE EDGE. This will make the tape
hang up in the reel or at the tape guides.

If you make the piece of SPLICING TAPE TOO SHORT, the splice
will not last long.

If you leave too many BUBBLES under the splicing tape, or if
you handle the tape with GREASY FINGERS, the splice will not last
long either.

If you make the piece of SPLICING TAPE TOO LONG, the tape may
"thump" going by the heads.
TO take a splice apart, bend it backwards right at the join
and peel the recording tape off the splicing tape.
Tape Loops
The tape loop is one of the oldest tricks in the business,
but it is still effective. Making a loop is simple; you merely
splice the end of a piece of tape to its beginning. It is the
playing of a loop that is sometimes tricky. The tape must be kept
in the proper relationship to the heads and cutoff sensor without
benefit of the takeup or supply reels.

Short loops are very easy in the UCSC Studio. Above each tape
deck there is a counterweighted pulley on a string. Thread the
loop in the machine in the usual way and hook the pulley under
the top of the loop. The weight keeps the tape taut and the loop
can be played. Take care to avoid the reel platforms, as they
will spin when the loop is played. If the loop rubs them, you
will get a fluttery sound.
Longer loops require the use of two pulleys, and perhaps one
of the metal hooks, but still work in a straightforward manner.
The very longest loops require the use of a microphone stand.
Thread the loop around one or two pulleys and a mic stand placed
where it will do the most good. In cramped quarters you can pass
the loop through pulleys and then back over your shoulder.
Here are some additional tips:
Always mark the direction of your loop with an arrow. It's
a good idea to put a number on it too.
The best way to store a loop is to coil it up around your thumb
and put it in a matchbox. If you plan on keeping a lot of loops
around, you may want to buy a little plastic box with a lot of
compartments. Tape loops left hanging around the studio will not
last long.
Very short loops may be played inside out. The head guard will
keep them in place.
If you play a loop and nothing happens, the loop is probably
backwards. The second most likely cause is that the tape is outside
the flip-up head shield.
Tape Echo
If tape loops are not the oldest trick in the book, then tape
echo is, but even this hoary old cliche has its uses now and again.
Tape echo is developed by the distance between the record and
play heads on a tape deck. The tape must take some time to travel
this distance. Therefore, if you are listening to the tape as
you are recording you hear the recorded sound a little later than
the original.
Multiple echos are achieved by using a mixer to combine some
of the playback signal with whatever is being recorded. This is
a feedback situation and care must be taken to see that echos
diminuendo as they come around rather than build up. Whenever
you do tape echo keep your awareness on the knob that controls
the level of the fedback signal. After some practice you will
be able to control the echos to the point where you can keep a
constant signal level.

Here's how to set up basic echo on the revox:
Patch a source (better not use a microphone the first time
you do this) to the left channel of a Revox. (Set both input switches
to aux to get the patch bay).
Patch from the LEFT OUTPUT to the RIGHT INPUT of the same Revox.
Select the Revox output on the monitor.
Set the Revox switches: MONITOR TAPE, RECORD-L ON, RECORD-R
OFF, both input level knobs down.
Start recording and start the source. Turn the left input level
up until you hear the recorded material. Turn the right input
level up until echos start. Now by playing with the two level
controls you can vary the number of echos, the relative levels
of the echo and original, or even eliminate the original and sustain
the echos. (This works on the Revoxes because of the internal
mixing feature. If you do this on another tape deck you will need
a mixer in the patch.)
The first variation on this is to use two tape decks for longer
delay. (Remember Pauline Olivereos' "Bye-bye Butterfly"?)
The patch is almost the same:
Connect the source to the left input of the left hand deck,
and the left output of the right hand deck to the right input
of the left hand deck. The right hand deck does not need an input.
Set the left hand deck to record and the right hand deck to play.
Thread the tape from the supply reel of the left hand deck
through both sets of heads to the take up reel of the right hand
deck. Hang a loop pulley on the tape to keep it taut.
Start both decks playing (they better be set at the same speed!).
The right hand deck is deliberately a smidgeon faster than the
left so the tape will stay tight.
Put the left deck in the record mode and apply the source.
Presently you will hear an echo. The levels are controlled as
above.
If you play with the varispeed at this point you can get some
interesting Doppler effects. You will soon find the limits of
this technique.
The most interesting applications of tape delay involve processing
the fedback signal. This is simple to add, merely patch from output
to input by way of some processing device. Now whatever that device
does will be doubled for each echo, often with startling results.
I leave the various possibilities to your experimentaion.
The Lowdown on Getting Good Sound
With a Cassette Deck
With the very best analog tape decks it is possible to get
a recording quality that is as good as digital. Unfortunately,
such decks, which run at 30 ips and use extra wide tape, are more
expensive than DAT machines. Since most of us cannot even afford
DATs, our problem is more prosaic: how to get acceptable sound
from a cassette.
The cassette has two strikes against it. The tape is very narrow,
and it moves very slowly. The effect of both factors is to reduce
the amount of signal that can be recorded. Since the tape has
a certain amount of noise built in, the basic quandry is to get
the signal as hot as possible (to be louder than the noise) but
not distorted due to tape saturation. To really understand what
is going on, we need to look at three factors that are normally
hidden from the user-- tape bias, equalization, and azimuth.
Bias
All analog tape is recorded with a high frequency AC bias added
to the signal to reduce distortion.

Changing the amount of bias has several effects on the result.
As bias is increased, the level of the output increases up to
a point, then falls off again. This effect is more pronounced
at high frequency than at 1000 hz, so the overall frequency response
changes. Also, as bias increases, distortion decreases, and then
begins to creep back in. By the time distortion bottoms out, the
signal level has usually peaked and fallen 1.5 to 2 dB. The tightness
of the distortion curve depends on the brand of tape-- some require
a very precise bias adjustment to give best distortion, others
are more forgiving.

Bias is one of the things that is changed when you set the
deck for type I or type II tape. This is often automatic, (keyed
by a cutout on the cassette shell) but if it is not, you must
get it right for good sound. Many cassette decks allow the user
to make a small adjustment in the bias level. Generally this is
used to trim up the high frequency response-- increasing bias
reduces the highs.
Since bias is just a very high frequency signal, it is possible
for the highest partials of the music to act as additional bias
and paradoxically reduce the high frequency response. The Dolby
HX PRO feature is a circuit that compensates for this, adusting
the amount of bias according to the spectral content of the recorded
signal.
Equalization
As a hedge against noise, the signal recorded on the tape has
a high frequency emphasis. When played, the electronics reduce
the high end to normal level, effectively filtering the tape noise.[2] Unfortunately, this
has the side effect of making highs very likely to distort. For
standard cassette tape this emphasis starts at about 1 khz[3]. With premium tape,
which is quieter, the emphasis is moved up an octave[4]
so that the highs will not hit saturation so soon. This is also
set with the type I /type II switch, which must be checked for
both recording and playback.
NOISE REDUCTION
Noise reduction systems are an elaboration on the equalization
concept. All versions depend on ENCODING before recording and
then DECODING upon playback, so you must be sure to do both according
to the same rules. There are two basic types of noise reduction,
each with a series of variations.
DBX
In the dbx system, the signal is compressed by 2:1 when recorded,
and then expanded upon playback. This definitely reduces noise
by 20 or 30 dB and also prevents distortion, but it can have two
bad side effects. Sometimes you can hear the noise "pumping"
(especially on bass tracks), and if there is any loss of high
frequency signal during the recording, (common enough in cassettes)
the decoding will not be accurate. DBX type II addresses the second
problem by keying only on the mid band signal. This is usually
all right, but material that is principally high or low may be
distorted because it is read as no signal during encoding and
amplified.
Once a tape has been encoded with dbx, it sounds horrible if
played without decoding.
DOLBY
The dolby systems also compress upon recording and expand during
playback, but they do this within restricted frequency bands:
Type A covers the entire audio spectrum with four bands.
This is the old professional standard. It avoids most of the pumping
of dbx, but does not give as obvious benefit on silences (only
about 10 dB).
Type B deals only with the region above any recorded
frequencies. This is used often on cassettes (where
the A system would cost more than the deck does) because most
noise is high frequency in nature. It gives a 10 dB reduction
in the high hiss area, which sounds like cutting the noise in
half.
Type C has two bands, basically using type B twice The
overall noise reduction is about 20 dB.
Type SR is quite complex, resulting in an analog tape
that is quieter than digital.
The latest flavor of Dolby is type S, an advanced system
optimized for cassettes. It is not widely available, but should
be very nice when it appears on affordable decks.
Probably the best feature of Dolby is that B and C encoded
tapes are usable without decoding. The high frequency response
will not be right, but the sound is not too awful. As a matter
of fact, playing an unencoded tape with type B decoding will sound
quiet, and lots of decks don't have much in the way of high frequency
anyway. The worst feature of B is that if the deck does loose
highs in the recording process, the Dolby circuit will make things
worse.
AZIMUTH
If the signal on a recorded tape were visible, it would look
like a series of short bars perpendicular to the tape edge, rather
like a tire track. This distance between the bars depends on the
frequency and tape speed, and is in fact the wavelength of the
signal on the tape. For a signal of 15khz on cassette tape, this
distance is 0.000125 inches or about the width of a fine hair.

Azimuth is the angle of the tape head to the tape. If this
is not the same for playback as it was for recording, the gap
(which is the part of the head that actually detects magnetism)
would straddle two bars, reducing the amount of signal. (The spaces
between the bars represent the negative parts of the cycle.) Thus
azimuth errors tend to reduce high frequency response. This is
purely a mechanical matter, and is primarily affected by the cassette
shell. High quality tape will be in a good shell, cheapies often
are not.
SO, HOW DO YOU GET DECENT SOUND OUT OF A CASSETTE?
1. Spend some bucks and get a decent deck. The ninety dollar
wonders usualy are very poor in the mechanics that assure consistant
azimuth, and probably add flutter (tape speed variations caused
by a not round or bent capstain) as well. Don't go overboard,
of course. A deck priced in the $200 to $300 range will probably
be fine. Features to look for are adjustable bias, HX PRO, and
DOLBY C noise reduction.
2. Use good tape, and always use the same kind. Sometimes you
have to experiment with several brands to find the one that is
best on your deck. The decks in the studio work well with type
II Maxell or TDK, but they are tweaked for the BASF that I sell.
Tapes wear out faster than you think. After thirty or fourty rewindings
the the oxide begins to flake off and the lubricant that lines
the walls of the shell (there aren't any reels in there) goes
away,.
3. Keep the deck clean, and protect it from bumps. With wavelengths
the size of a hair, it doesn't take much grunge to reduce high
frequency response. Some brands of tape advertise head cleaning
leader. This can't really do much, and whatever it does do will
only happen the first few times the tape is played. Clean the
heads with 91% isopropyl[5]
alcohol. Azimuth will not change by itself, but it can when
the deck is dropped, or if a cassette is forced in or out.
4. Set the deck for the proper tape type. Often this is a switch,
but many decks select between standard and Type II/metal tape
as indicated by a notch on the shell right next to the record
protect tab. Be sure you never cover this notch. Even if the deck
switches automatically, you have to use a switch to select metal
or type II. (Very few decks record well on metal tape.)
5. If the deck has adjustable bias, set it so the highs sound
correct. This is easy on a three head machine (the sound quality
should not change when you switch from input to tape), but on
most decks you have to make a series of trial recordings.
6. Record at the proper level. Most people try to get too hot
a signal on the tape. The meters on the deck are peak meters,
so steady tones should be recorded at -4 to avoid distortion.
Most decks begin to loose high frequency response above -10.
7. Label your tapes. Then you don't have to play them (and
wear them out) to find out what they are. Write the type of noise
reduction used on the label so it will be played properly.
__________________
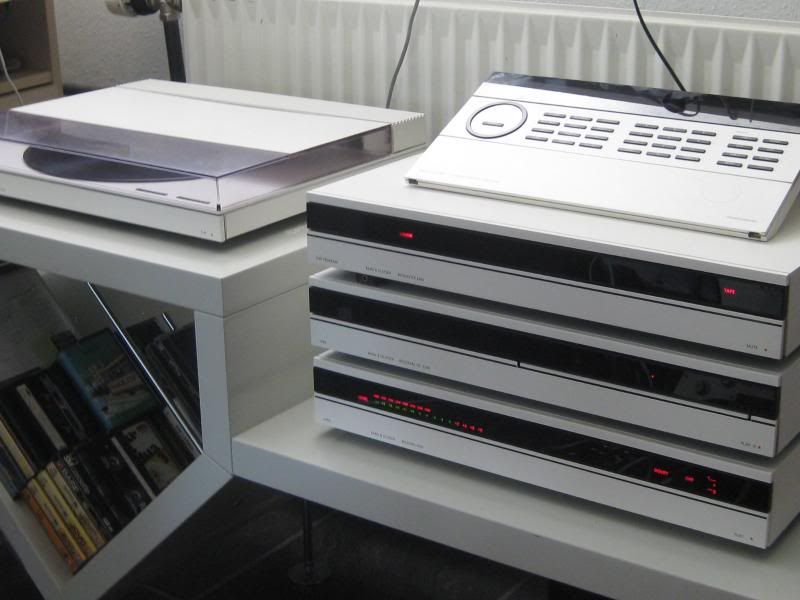
for tiden afspiller jeg meget musik - det lyder godt
 Aktive emner
 Brugere
 Søg
Søg Emne: cassettebåndoptager igen


 Jeg tænker bare... dual capstan, 3 hoveder og hx pro - så kan det vel ikke gå helt galt - eller hvad?
 Nu bliver jeg jo næsten helt vild i varmen... jeg vil da i hvert fald nok hellere have sådan en Sony en sådan en Denon - i hvert fald når vi snakker design, men også når vi kommer til lyd? Og træsider gør det jo bare ekstra frækt...